Do you want to build a workbench yourself but don’t know how to start? Or are you running out of DIY ideas?
That’s where we come in with a list of 75 workbench plans and ideas that help to kickstart your hobby right away.
Each project includes a source with step-by-step directions, as well as description pictures or diagrams. We will also provide some tips when needed.
So without further ado, let’s get down to work!
Table of Contents
- 1. All-Purpose Workbench
- 2. DIY 2×5 Workbench
- 3. Table Saw Workbench
- 4. Two-frame Workbench With Casters
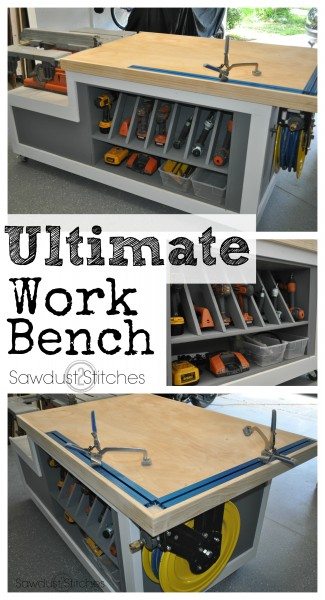
- 5. Ultimate Mobile Workbench
- 6. 4×8 Workbench Outfeed Table
- 7. Simple Portable Workbench
- 8. Heavy-Duty Workbench
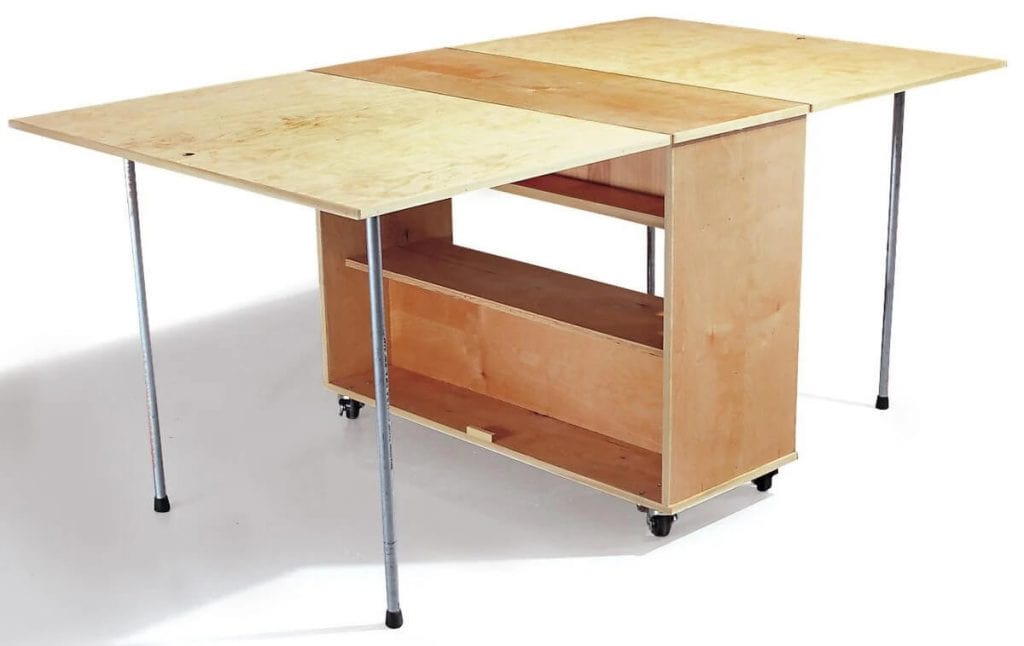
- 9. Foldable Workbench With Storage
- 10. Functional Workbench
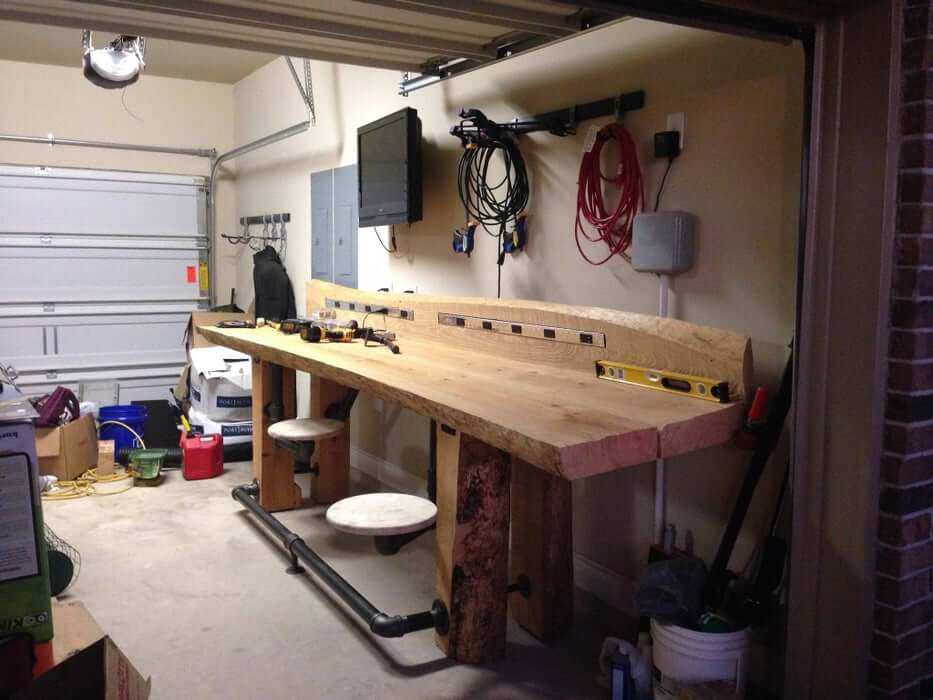
- 11. Simple 1-car Garage Workbench
- 12. Apartment Workbench
- 13. Children Workbench
- 14. Workbench For Small Workshops
- 15. Rigid & Long-lasting Workbench
- 16. Free Easy Build Workbench
- 17. Traditional Workbench
- 18. Comfortable & Cheap Workbench
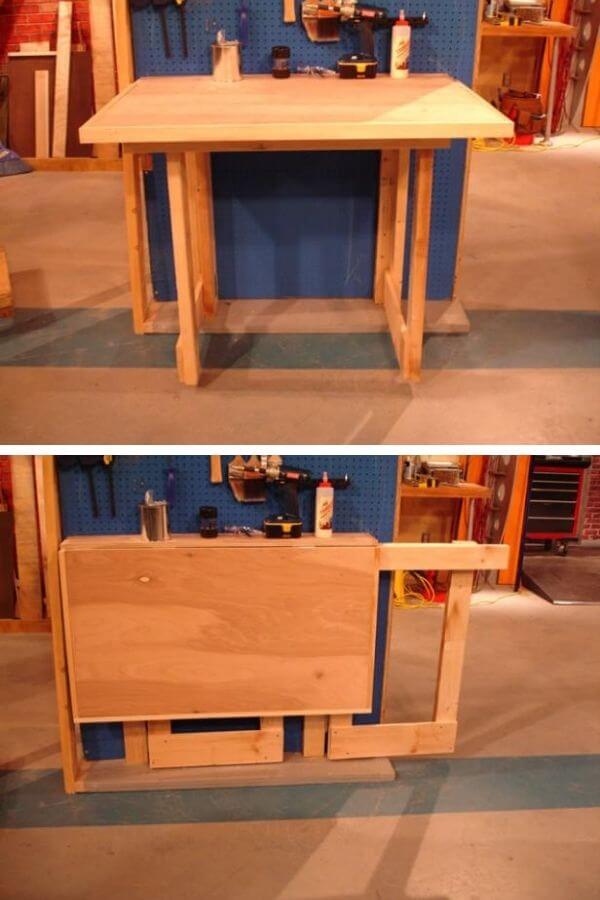
- 19. Fold-down Workbench
- 20. Timber Workbench
- 21. Drop-down Workbench
- 22. Easy Workshop Workbench
- 23. 4-hour $70 Workbench
- 24. Simple Sturdy Workbench
- 25. Budget Workbench
- 26. Simple Foldable Workbench (No Storage)
- 27. DIY Rolling Workbench
- 28. Sturdy Work Bench
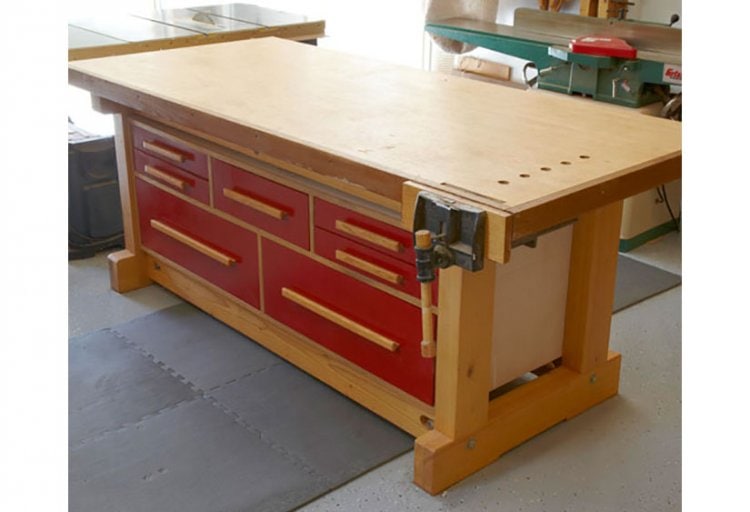
- 29. Cabinet-Based Workbench
- 30. Scrap Workbench
- 31. Closet Workbench
- 32. Novice Level Workbench
- 33. Workbench With Solid Frame
- 34. Workbench For Tall Guys
- 35. Ultimate Garage Workbench
- 36. Easy Build 2×6 Workbench With Casters
- 37. Twin Rolling Workbenches
- 38. 2×4 Flip-top Workbench Cart
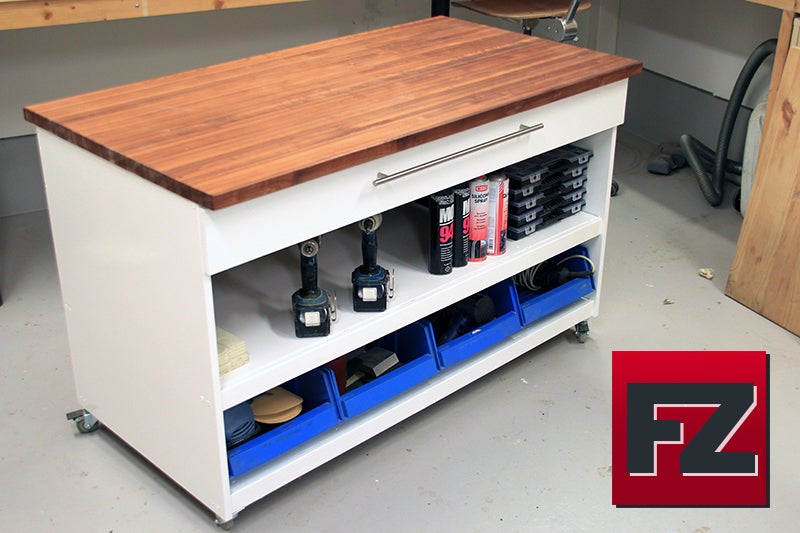
- 39. Portable Workbench With Lots of Storage
- 40. Modular Workbench
- 41. Thorough Workbench
- 42. Mobile Workbench
- 43. Super Workbench
- 44. Low-cost Workbench
- 45. Simple $50 Workbench
- 46. Compact Fold Away Workbench
- 47. Workshop Workbench With Shelf Dividers
- 48. Wall-mounted Folding Workbench
- 49. Real Woodworker’s Workbench
- 50. Free DIY Plain Workbench
- 51. DIY Kids Workbench
- 52. Folding Portable Workbench
- 53. Classic Pine Workbench
- 54. Pallet Workbench
- 55. Workbench With Hidden Shelf
- 56. Roll-around Workbench (No Shelf)
- 57. Easy 2×4 Garage Workbench
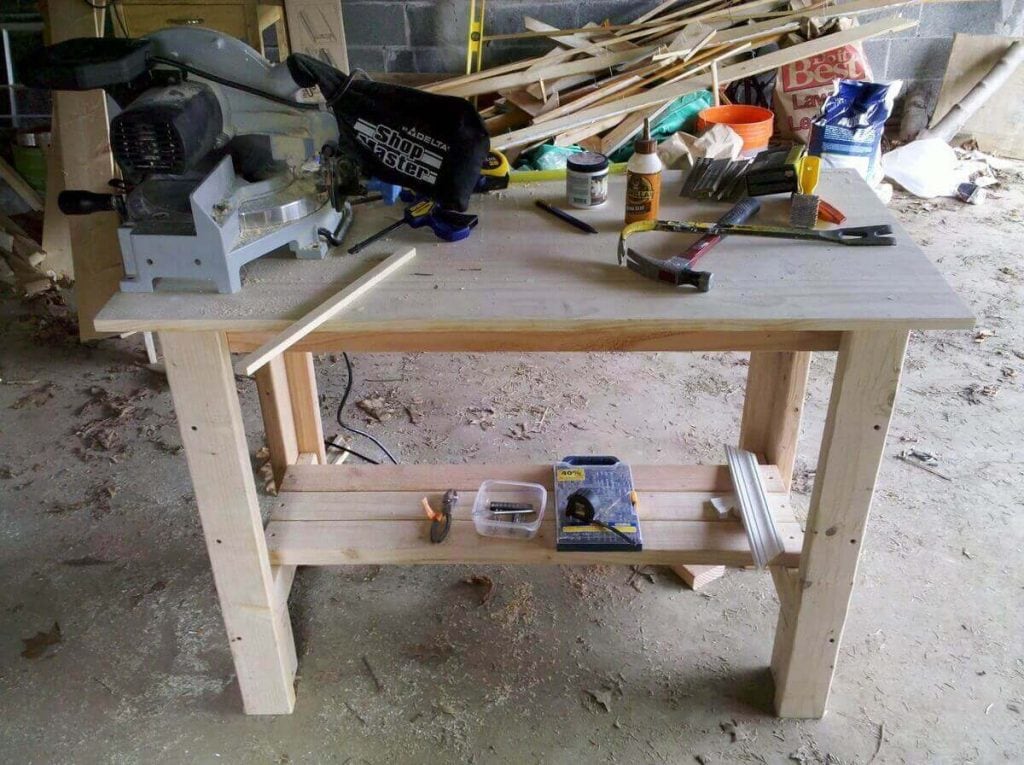
- 58. Workbench With Miter Saw Stand
- 59. Inexpensive Solid Workbench
- 60. Super Space-saving Workbench
- 61. Utility Workbench
- 62. Durable and Cheap 2×4 Workbench
- 63. Easy Build Workbench
- 64. Collapsible Workbench
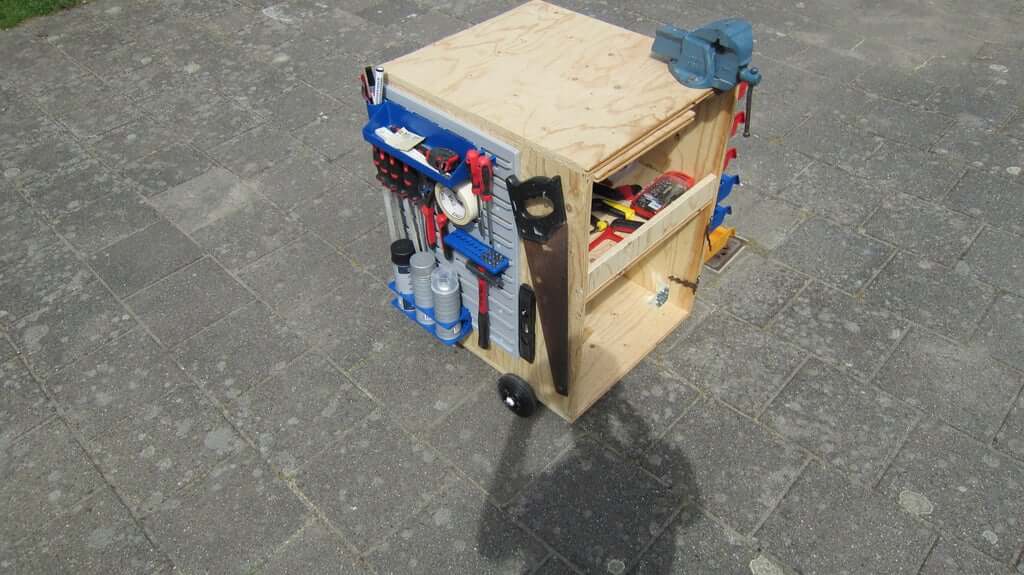
- 65. Cubic Blueprint Workbench
- 66. Cheap Workbench
- 67. Portable Workbench
- 68. Pony Wall Workbench
- 69. Removable Top Workbench
- 70. Storage Workbench Plan
- 71. Beginner Workbench
- 72. Knock-down Workbench With Dividers
- 73. The Folding Workbench
- 74. Workbench with Versatile Inserts
- 75. Workbench and Companion Worktable
- Conclusion
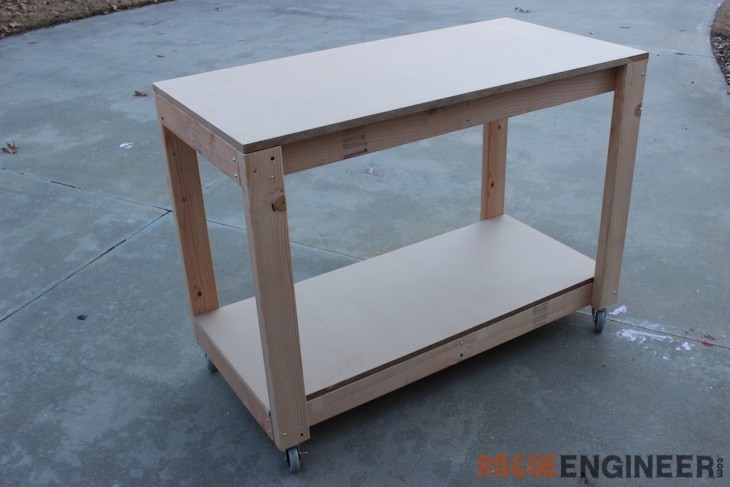
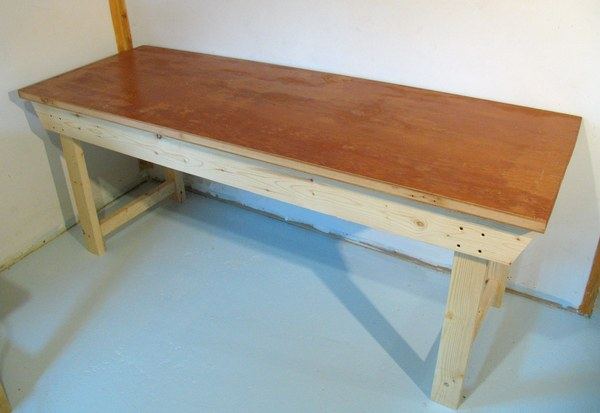
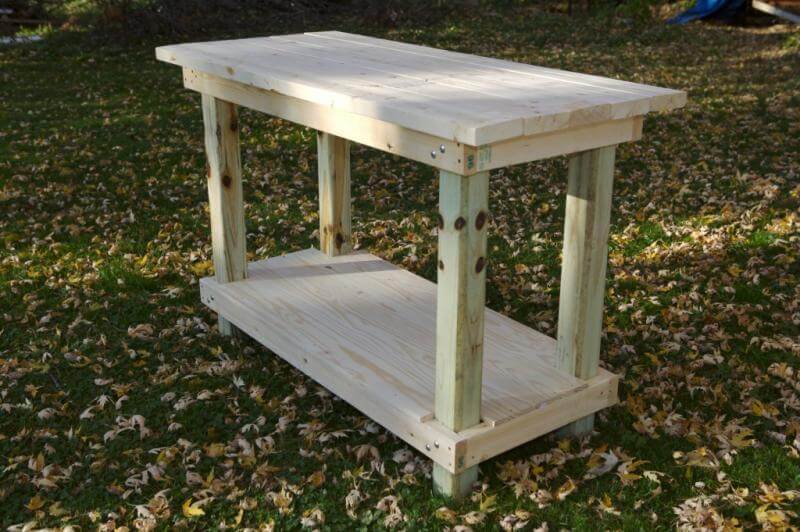
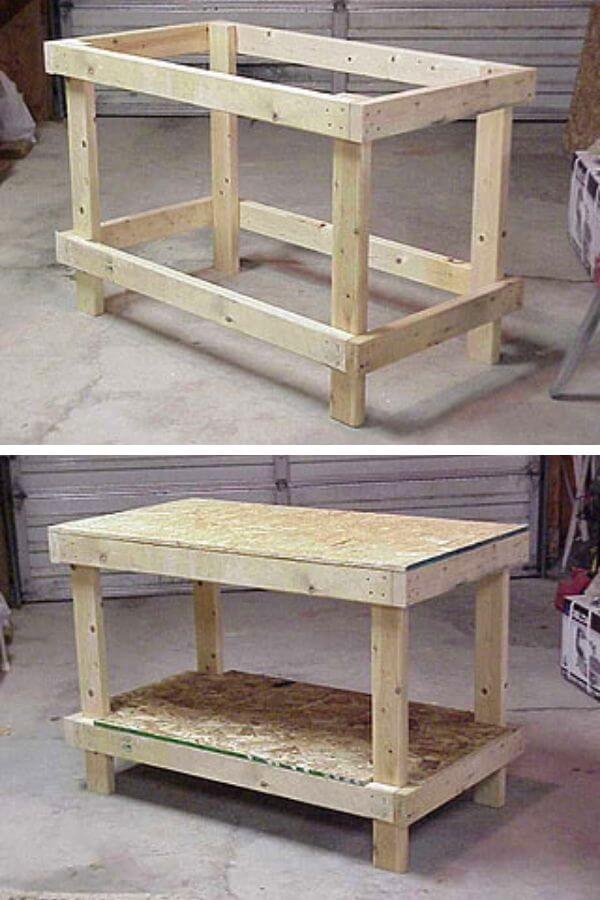
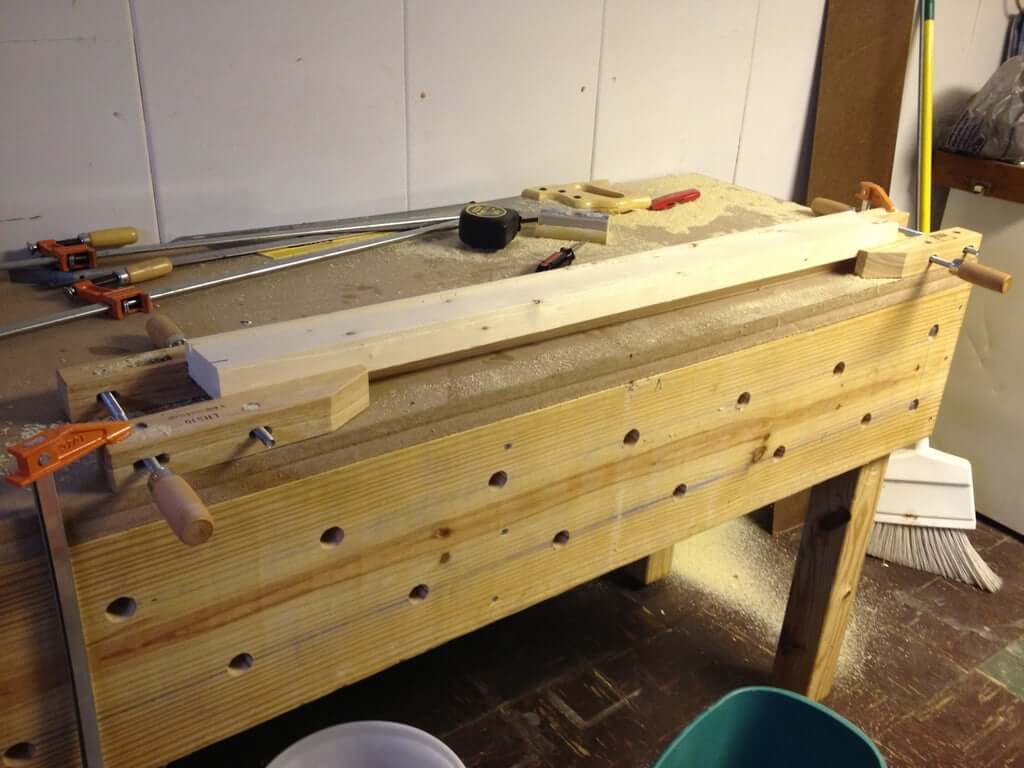
1. All-Purpose Workbench

This plan can help you build a basic workbench silhouette suitable for any using purpose. Consequently, the assembly is as easy as pie so that everyone can follow.
One prominent advantage of this plan is the author measured the size and dimensions of each material carefully. He/she also mentioned the actual plywood thicknesses for your better preparation.
The materials run about $120 – not so expensive but still pricier than other workbench plans in this article. But at the end of the day, you’ll get what you pay for.
Read more here2. DIY 2×5 Workbench
If you find the all-purpose workbench materials a bit complicated, this plan is for you. The shopping list is simple with one sheet of plywood (used for both shelves) and other common materials.
Besides, the author included her own diagrams and recommendations in each step. Make sure to read the general instructions before getting your work started.
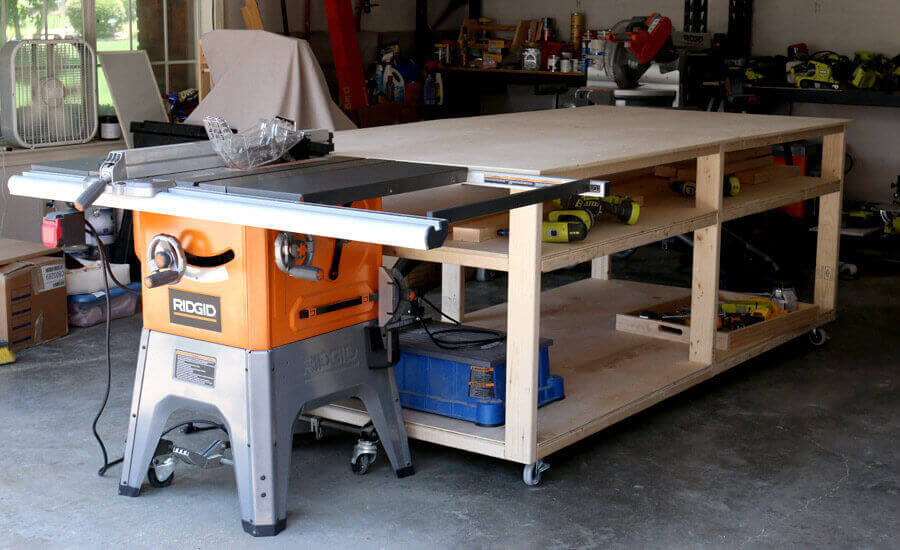
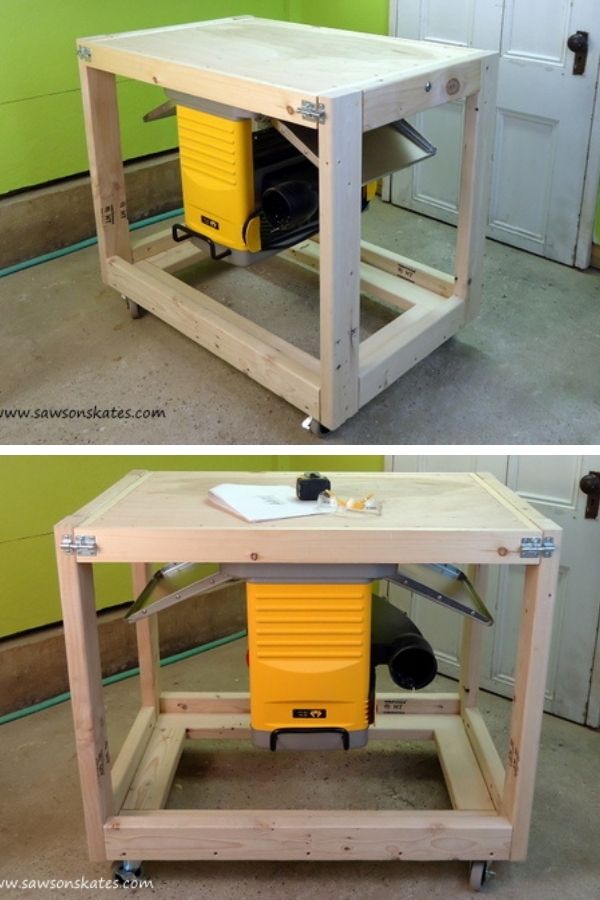
Read more here3. Table Saw Workbench
This workbench idea is a design for table saws and wood storage, making your woodworking more organized.
The cost will vary depending on the materials listed by the author. But don’t worry, the average estimated price is around $70-80, which is much cheaper than that of a store-bought workbench.
The author added a lot of photos for each step, and every image contains detailed measurements. Additionally, remember to pay attention to the extra notes for the most complete result.
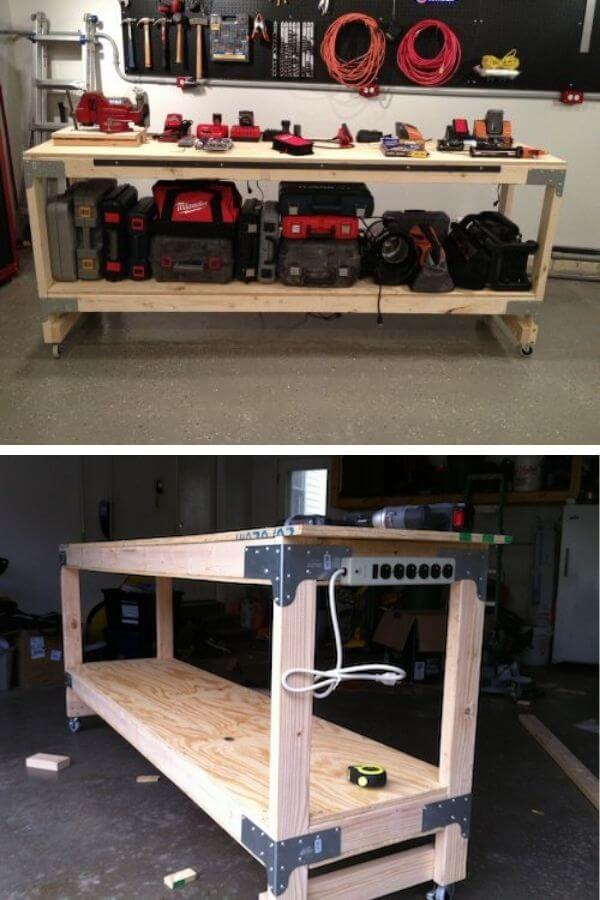
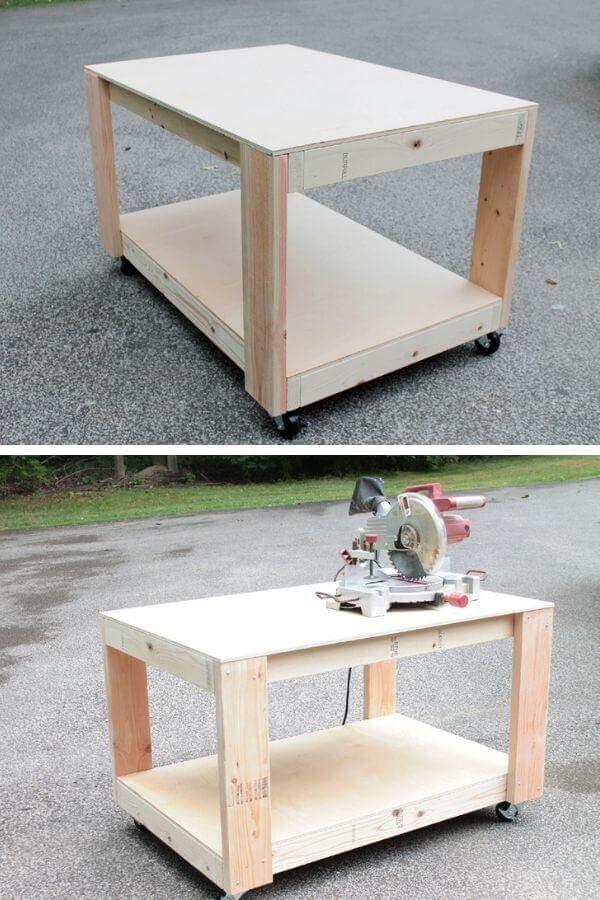
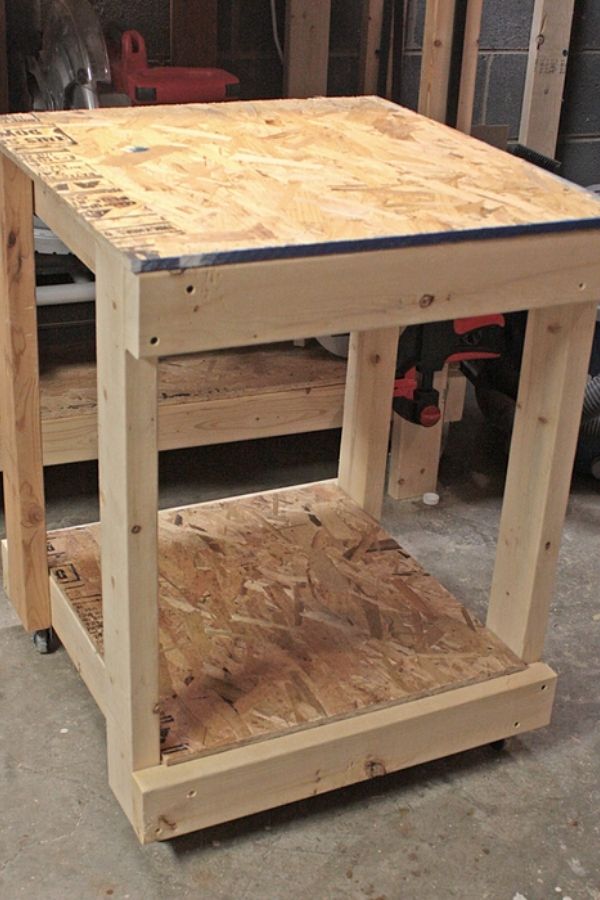
Read more here4. Two-frame Workbench With Casters
This workbench has a simple design for a table saw with 2 frames: top and base. The instructions have many detailed photos focusing on the legs and corners to make a more rigid structure.
What’s more, the author added rubber locking casters to the table saw bench to make it easy to transport.
Sometimes you have to work in another place, and moving a workbench is regularly plump and hassle. The casters make lifting the power tool no longer a big deal.
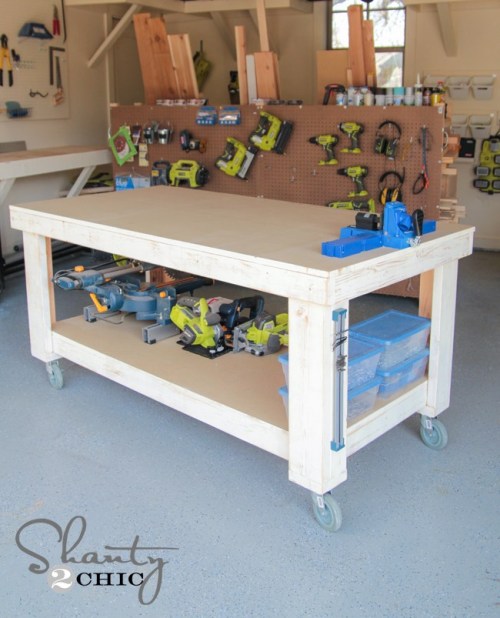
Read more here5. Ultimate Mobile Workbench
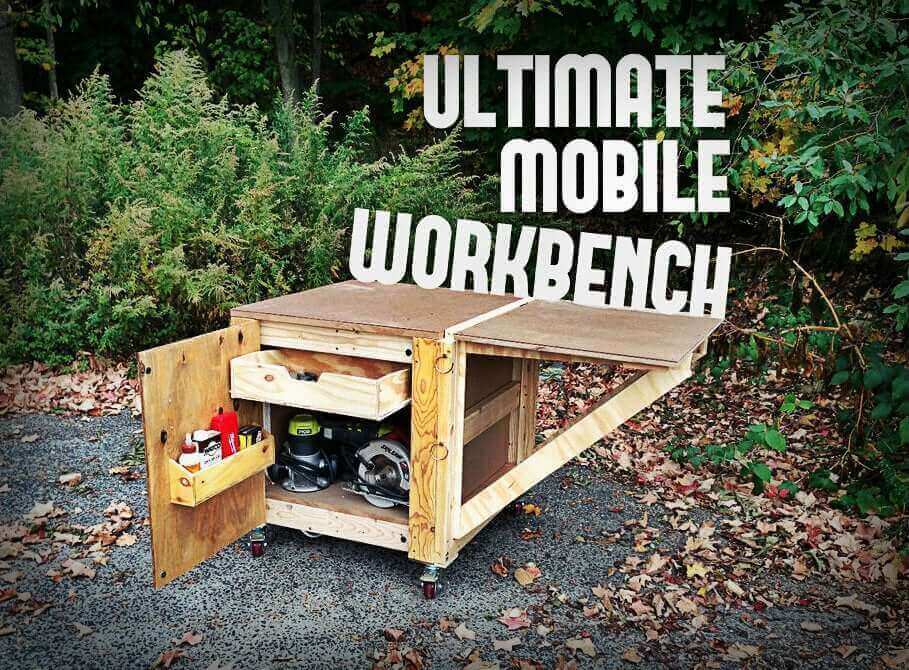
The advantage of this workbench is mobility. You can expand and adjust the top vertically and bolt any large power tool down on a pegboard wall.
Due to multitasking-structure, this plan is quite complicated. The process consists of 10 steps, and the author describes each step in extreme detail. Besides, it costs around $150-200.
Read more here6. 4×8 Workbench Outfeed Table
If the above plan is ideal for a small workspace, this design is for big garages.
This enormous bench fits a full sheet of plywood on it – 4 ft. wide and 8 ft. long. The cost runs from $100-150 depends on the plywood’s quality.
The plan features many descriptive pictures and a diagram showing the workbench’s whole structure with measurements for each shelf.
Read more here7. Simple Portable Workbench
This is an easy option that can be done in half an hour under a $100 budget. It only requires ½ sheet of MDF (Medium-density fibreboard), so you can make use of the second half to build another table.
Each step contains 1 colored diagram and many pictures showing the real result. The sketches also include measurements and additional notes.
Tip: you should have the MDF sheet cut at the store since it’s heavy as hell. The cut list is already included for your reference.
Read more here8. Heavy-Duty Workbench
This plan uses thick plywood to build a workbench with over 400 lbs of weight capacity.
The steps are clear and understandable, but it should be better with detailed dimensions on the photos.
According to the author, you will need less deflection on the lower shelf than the upper one. Therefore he wants to build the upper frame for both tools storage and workspace, while the lower one is only for storage.
Read more here9. Foldable Workbench With Storage
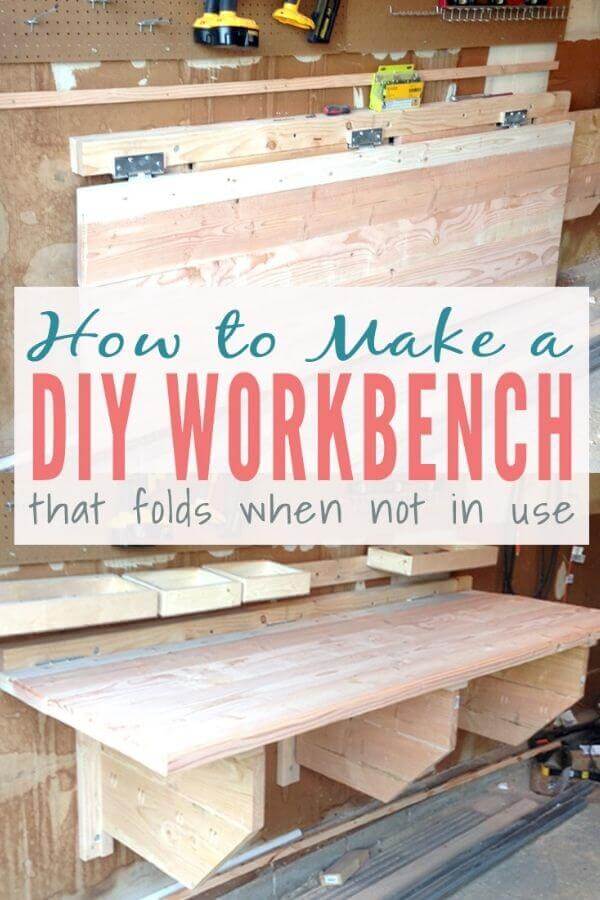
This idea is suitable for those who’ve already had pegboard or cleat shelves on the wall. The workbench also stuck to the wall and folded down when not in use
The tutorial is super detailed with color diagrams and tons of materials tips. The author also instructs how to mount the pegboard and create a French cleat shelf if you don’t have one.
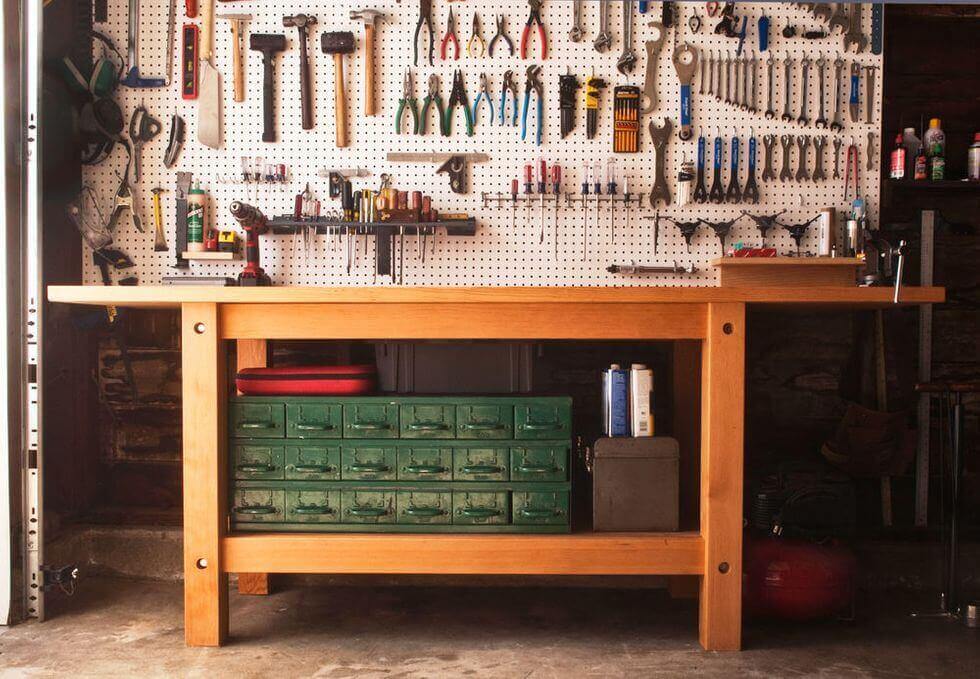
Read more here10. Functional Workbench
In our perspective, this is one of the most professional DIY workbench plans that give you a beautifully handcrafted functional product. Therefore, it requires a systematic building process.
But don’t be afraid, it’s not that hard. There is a technical drawing marking the workbench’s individual parts, and the material and shopping list are also based on these symbols.
Read more here11. Simple 1-car Garage Workbench
This workbench is 2′ wide and 8′ long, which is the average for regular woodwork. It fits perfectly in a 1-car garage. The tutorial is also a piece of cake with only 5 steps.
You can store a rolling toolbox on one side and place wood or crates on the shelf on the other side.
Read more here12. Apartment Workbench
Unlike workbenches in garages, an ideal apartment workbench needs to be odorless, durable, and also creates as little noise as possible while building.
That’s why the author chose cedar lumber, thanks to its durability and availability.
Moreover, this workbench has a space-saving design, which is also a plus for apartment spaces.
Read more here13. Children Workbench
This plan is a budget-friendly alternative for a brand new store-bought workbench that your children will definitely love.
The back panel is actually a chalkboard, allowing your kids to paint anything they want.
Besides, it is simple enough for the kids to join your handcraft project. You can finish the plan in a short time with just a Kreg jig so start to roll the ball right away!
Read more here14. Workbench For Small Workshops
This workbench can easily fit in the corner of your shop and still leave plenty of working space for you. Like the children’s workbench, it can be done in a few minutes easy with a Kreg Jig, no glue required.
The design is also simple, with 1 tabletop, 1 shelf, and wheels for transportation ease. The author provides clear photos for every step so everyone can follow.
Read more here15. Rigid & Long-lasting Workbench
If you usually work with heavy-duty tools such as a V-8 engine, you will need a strong workbench that lasts for years.
This workbench is the one you’re looking for. You will have an instruction video with 3 technical drawings for easy construction.
Besides, this idea only costs $50-$100, so everyone can afford it. The only demerit is: it takes a whole day to finish. Be sure to process the plan on the weekend.
Read more here16. Free Easy Build Workbench
If you still find the above plans so complicated and pricey, this idea can satisfy you. It creates a no-shelf workbench (only a tabletop for the workspace) and uses low-cost 2×4 lumber.
With this plan, you can turn any old wooden furniture in your house into a brand new table saw for woodworking. Thanks to the simple design, the instruction is also a piece of cake.
Read more here17. Traditional Workbench
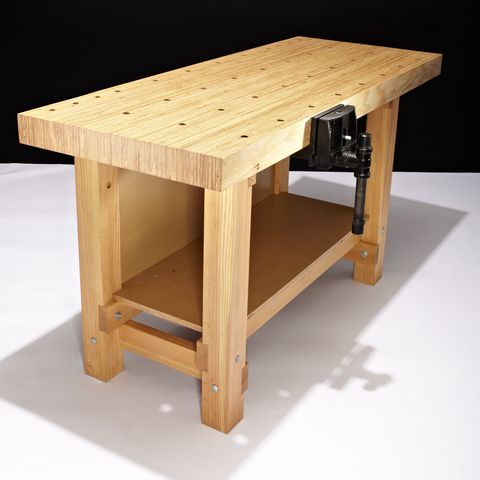
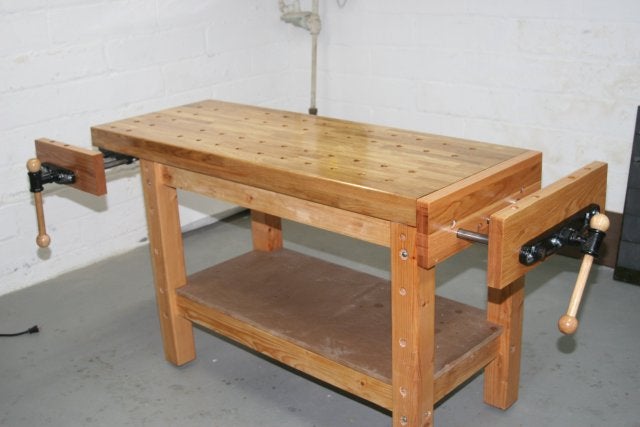
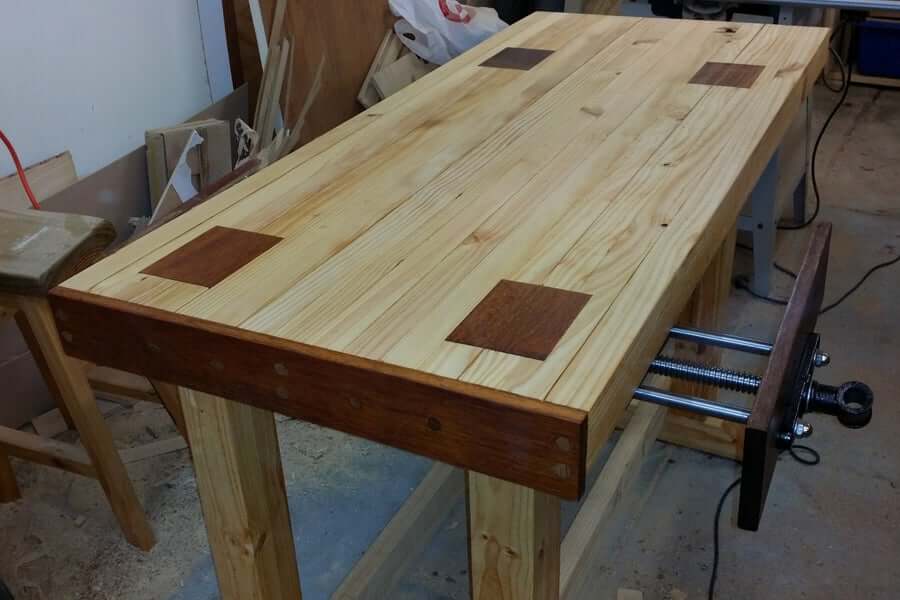
This workbench has an authentic classic design with a rough surface, bench dogs, vises, and hold-down clamps. A conventional craftsman will definitely fall in love with it.
The author includes diagrams for each step and explains them in detail. Unfortunately, all of them are hand drawings. It’s a little challenging to follow without real photos.
Read more here18. Comfortable & Cheap Workbench
This design is really user-friendly, especially for tall people, not to mention the super low price.
The workbench is over 3′ tall, so you can work in standing poses comfortably. Meanwhile, the bottom shelf is only 1′ deep, which means it won’t be in your way when sitting.
The author also measured out 1.5′ overhang on all sides of the top to utilize clamps when needed.
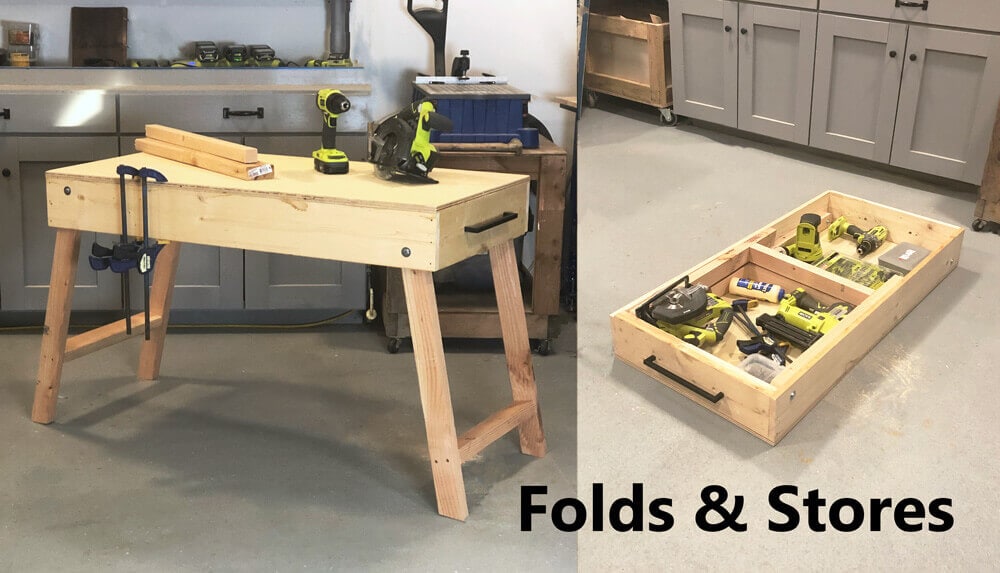
Read more here19. Fold-down Workbench
When folding up, this workbench provides more working space. When folding down, it turns into a compact wardrobe and creates extra parking space inside your garage.
The plan offers step-by-step instructions, including cutting, dividing drawers, or assembling the support arms.
Read more here20. Timber Workbench
If dead tree removal services are available in your area (or at least you have similar tools), follow this plan to turn a dead pine tree near your house into a tough workbench.
This table has a thorny style and is more suitable for men than women. The author also added some shore to the gap underneath the table.
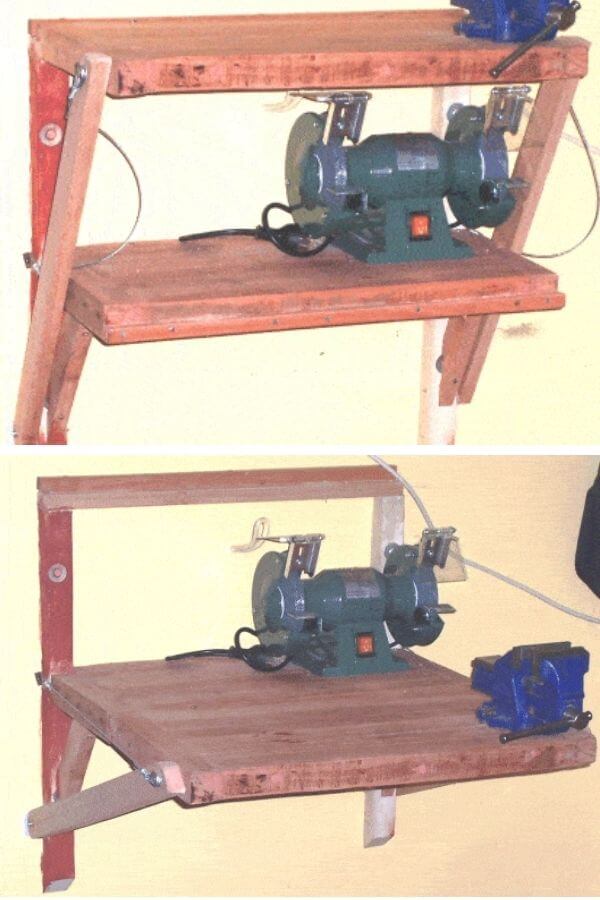
Read more here21. Drop-down Workbench
This workbench stays fixed to the wall, including a drop-down table so you can tuck it against the wall when not in use.
The author divides his content into 5 individual tabs to help readers follow it effortlessly. He also adds useful tips in some steps.
Read more here22. Easy Workshop Workbench
This workbench has a standard design and features open-ends for clamping. It’s also relatively tall to accommodate the standard workshop countertop height.
The author provided a very detailed cut list, and her diagrams are also filled with measurements and extra notes.
Read more here23. 4-hour $70 Workbench
As its names indicate, this is one of the cheapest and easiest plans. The author also suggests applying this idea to build a shelving unit.
The unique part of this workbench is a backlash attached to the shelf and top frame. There will be detailed instructions for marking notches, and you only need to follow the line in the next steps.
Read more here24. Simple Sturdy Workbench
This plan features not only step-by-step explanations with pictures but also an instruction video on how to build your favorite workbench. The workbench also has wheels for easy moving.
The total expense is around $140-$175. The author listed the particular cost for each material so that you can adjust the wood costs and other supplies to accommodate your budget.
Read more here25. Budget Workbench
This is our recommendation when you’re on a tight budget. It costs under $100 and only takes a few hours to finish.
The project is also simple, with only 3 main steps. The tools and materials list are both comprehensive. A video is also included so that you can watch and build the workbench simultaneously.
Read more here26. Simple Foldable Workbench (No Storage)
Again, this is another fold-down workbench, but with no storage, it’s simpler and takes less time. On the other hand, you will need a pegboard to stick your tools on.
The author didn’t attach too many photos, but it’s enough since the process seems easy and the design is really compact. The materials required are also basic options available everywhere.
Read more here27. DIY Rolling Workbench
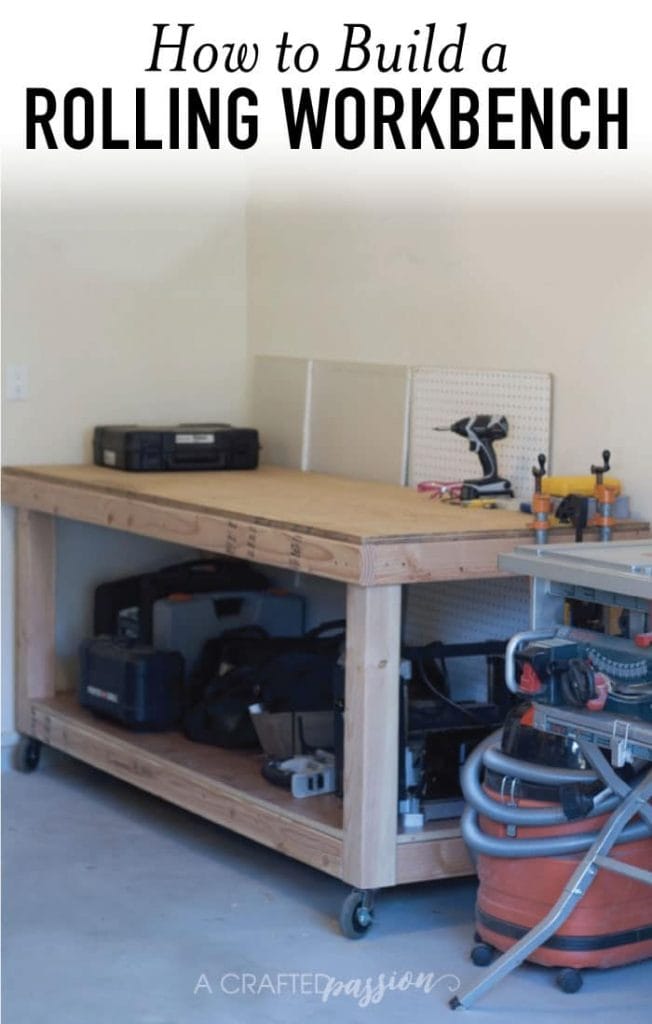
For those who spend the whole life building more time in whatever free space inside your apartment, this is the solution – a compact workbench with rollers.
The process might not be too easy, but the author’s writing style simplified it a lot. There will be close-up photos focusing on specific parts as well.
Read more here28. Sturdy Work Bench
This project requires simple sticks and laminated boards available all the time at Home Depot at a low price.
With the dimensions of 24W x 48L x 34H, it’s ideal for light wood jobs. And you can place all the miscellaneous items on the narrow shelf underneath.
Read more here29. Cabinet-Based Workbench
This workbench is a combination of classic style, massive storage, and vast tabletop and vises. You can comfortably handle the most difficult tasks on its surface.
There are 10 steps in total; each one comes with a description text and photo. Bonus: the drawers can slide from both sides of the workbench.
Read more here30. Scrap Workbench
We call this idea ‘scrap workbench’ to imply its simple and, somehow, boring design, not because it is made from scrap.
Some people don’t want to be afraid to repair, scratch, or dent the workbench, so they choose an ‘ugly’ look to reduce the cost and save time. If you’re one of them, give this project a try.
Read more here31. Closet Workbench
This plan got its name right from the place where it was created. The author utilized his closet with metal shelves and hangers to build a new floating shelf that works perfectly as a workbench.
If there is any similar space in your home like the balcony or old laundry room, for instance, try this out. It only takes 2-3 steps to finish.
Read more here32. Novice Level Workbench

This project will help you implement your idea from nothing to a complete product. You will get a simple design with rollers to increase portability.
The first step is to brainstorm all your knowledge and skills to make a sketch or 3D sample. Other starting stages, such as preparing supplies or sanding, are also explained carefully.
Read more here33. Workbench With Solid Frame

This plan focuses on choosing proper materials to get a professional result.
The author wrote about materials in a very detailed way, encouraging readers to use thick oriented strand boards for the top and 4×4 and 2×6 beams for the frame.
However, technical drawings don’t include too many measurements, so it can be a bit challenging for beginners. You will probably spend a whole weekend on this project.
Read more here34. Workbench For Tall Guys
This workbench measures 42H x 60L x 27.5W with 4×4 posts, which is rigid and high enough for more skillful gearhead jobs like rebuilding mechanism equipment.
The 42-inch height fits giant users better than the standard workbench height (30-39′). Besides, this project only takes you less than 3 hours and costs around $90.
Read more here35. Ultimate Garage Workbench
With only a few bucks, you will own professional instruction on how to create a premium workbench. Its sleek design, strength, and versatility will help to elevate your typical garage.
The instruction features a super detailed description text with photos and a technical drawing plan with measurements. The author also provided many tips to make the project more practical.
Read more here36. Easy Build 2×6 Workbench With Casters
This workbench has a sleek and sturdy silhouette with 2 tabletops. You can also customize the design to fit your needs.
The author divides his content into 5 particular tabs so that the article is easy to read. Click on each tab to view the steps, tools, materials, and cut list.
Read more here37. Twin Rolling Workbenches
This plan will turn your old lame working desk into 2 workbenches by utilizing the desk’s legs. You only need to add a plywood table top and shelves (if possible).
Read more here38. 2×4 Flip-top Workbench Cart
Fliptop cart is a space-saving solution allowing you to attach a tool on one side and then flip it over to hide it out of your sight.
The article will provide you with enough information about this unique design and color diagrams to help you build it right away.
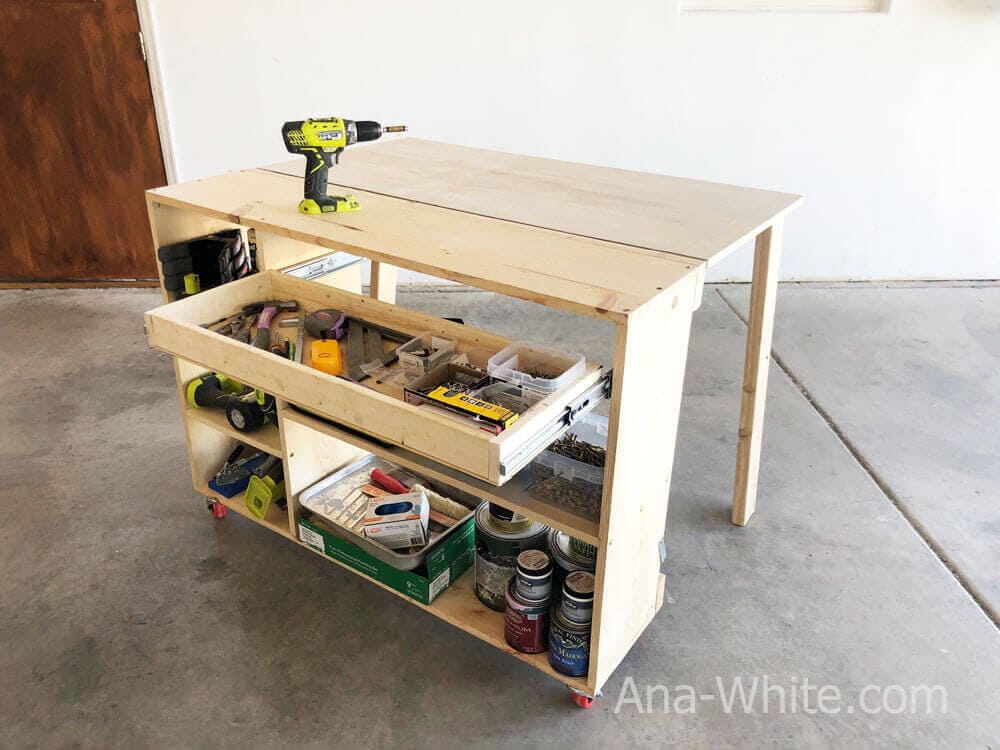
Read more here39. Portable Workbench With Lots of Storage
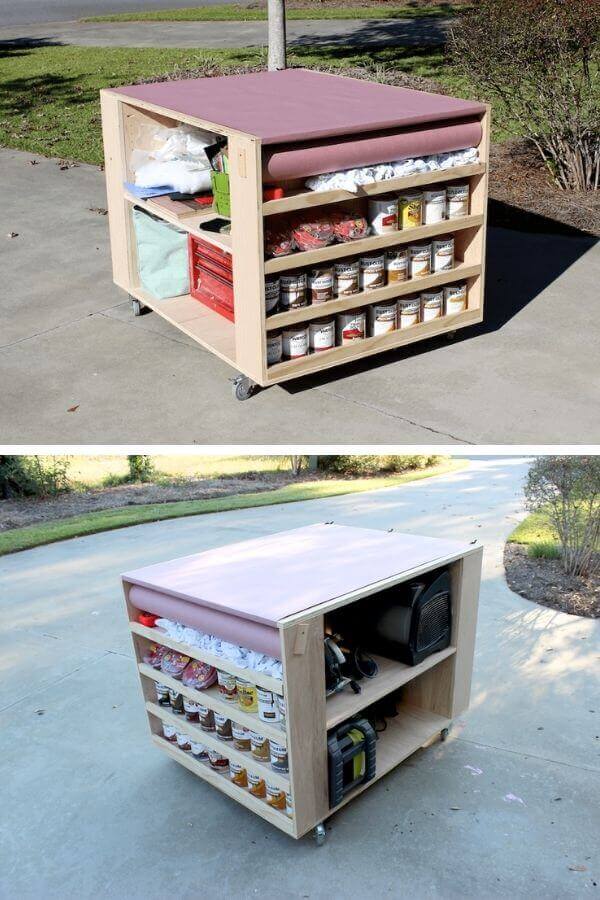
If you want to make the best use of the workbench’s size, the solution is storing beneath and on both sides. You could find a way to hold everything in this workbench and roll it along with you.
This smart design features baffles of different sizes and no drawer. Still, it can store many small things like painting cans, brushes, screw divers, etc.
Read more here40. Modular Workbench
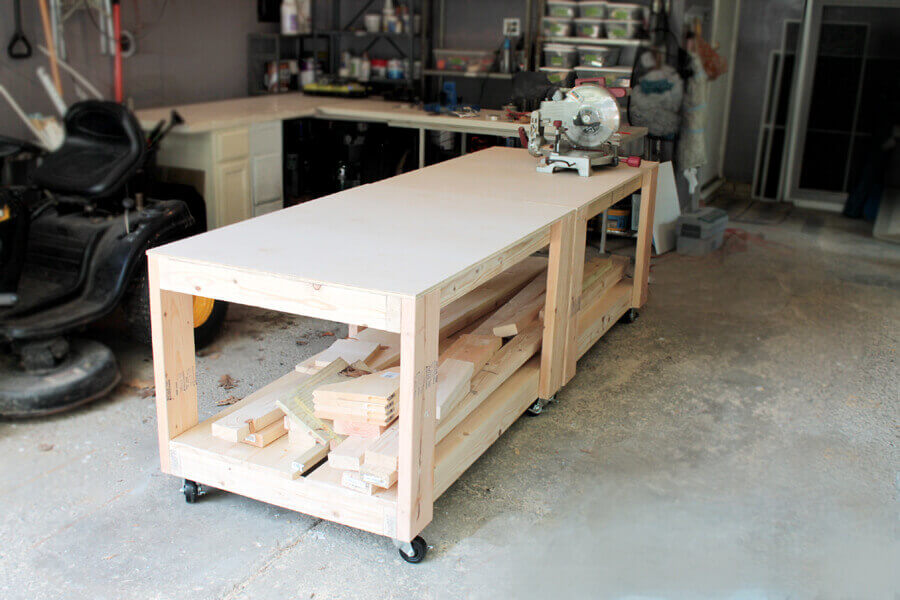
Here we are at the dream workbench plan that everybody thinks of. It includes just about everything you need for woodworking: a folding table, a roll-out table saw stand, a metier table, cabinets, and shelves.
The vast amount of parts and functions will take you longer and more materials to finish. Nevertheless, the complexity level is just a novice.
Read more here41. Thorough Workbench
The author has called this plan’ perfect workbench’ for a reason. The design might be lame, but the guarantee is its high quality.
The author wrote this plan thoroughly: he divided it into 35 small steps, each step has its own instruction print (download free). He also used a lot of joints and wedged mortise to ensure rigidity.
Read more here42. Mobile Workbench
The white painting, along with the drawer and shelves combination, will remind you of the furniture in Ikea stores.
This workbench can move around and create extra storage for your tools. The plan includes a 10-minute long video so you can watch and follow it step-by-step.
Read more here43. Super Workbench
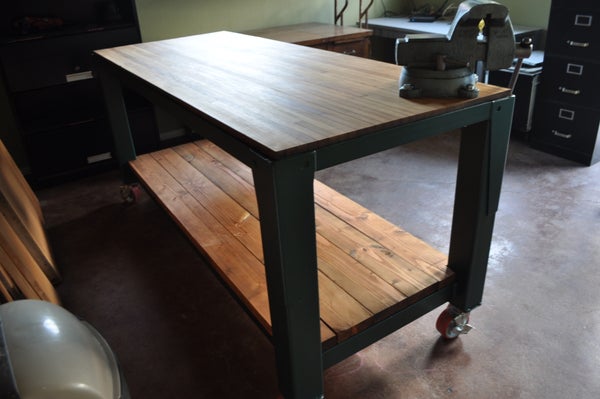
This workbench features metal legs and frames, tool chests, and casters. The bowling alley lane top is finished, while the bottom shelf is rough and uneven.
Moreover, this workbench is quite heavy and bulky, so we recommend it for large workshops. No glue is required since the building method is full-nailing a tongue and groove together.
Read more here44. Low-cost Workbench
2 hours of completion and a $20 budget – what an incredible cost! The cutting and assembly instructions are also legible with close-up photos.
On the downside, you can’t expect super reliable quality or premium materials with this quick-and-cheap project. This workbench is suitable for light to medium gearhead jobs, not for hammering or standing on it.
Read more here45. Simple $50 Workbench
If you have limited time and resources, this $50 plan may be worth a try. It has adequate room for all your woodworking equipment and ample space.
Using the tools and the shopping lists to compile what you need and then follow the directions to prepare for an hour of building this simple workbench.
Read more here46. Compact Fold Away Workbench
This is a moderate project that will cost you over $100 and take a full day to complete. It only requires 2 plywood sheets and necessary hardware.
The top is foldable on 2 sides so that you can turn the whole workbench into a compact cabinet in seconds. You can roll it around quickly with 4 wheels beneath.
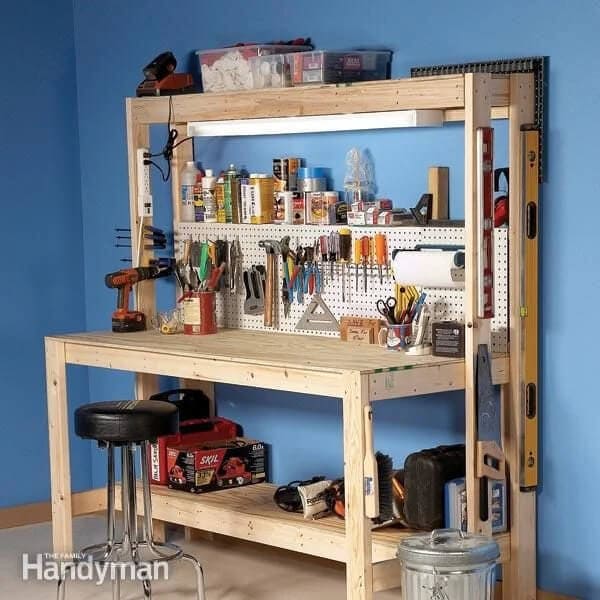
Read more here47. Workshop Workbench With Shelf Dividers
This is a multipurpose assembly table that fits a workshop space the most. One prominent feature is the dividers, allowing you to place your drills or guns upright in each cell.
The author made this workbench based on her previous lumber one and an old shelf she found on Free Craigslist, so it’s definitely cheap. We’re sure this idea will inspire you a lot.
Read more here48. Wall-mounted Folding Workbench
This design takes up no floor space because the workbench is totally mounted onto the wall. Once your work is done, fold it back into the wall.
There is a GIF that gives you a better visualization of how it folds up and down. A full technical drawing is also included for your reference.
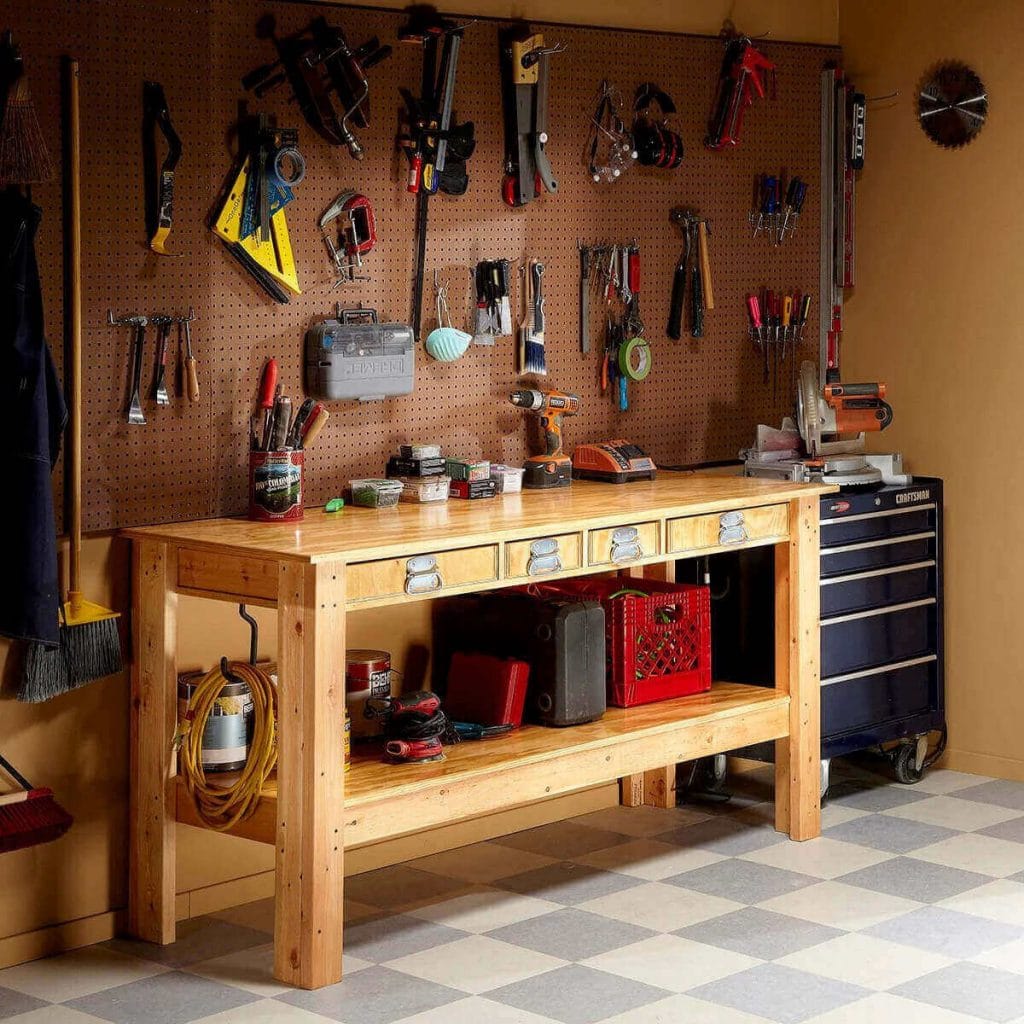
Read more here49. Real Woodworker’s Workbench
There are many design variations of workbench like drawers, cabinets, or table saws. But ‘real woodworker’ might prefer a proper work-holding system like this one: a combination of all work-holding mechanisms you can think of.
This plan explains how to set the base for holding every tool, cut the board, and assemble all parts. Be sure to read it from the start to the end since the method is quite complicated.
Read more here50. Free DIY Plain Workbench
We really appreciate this plan because it listed all the tools, materials, and cut list in tables. Even the how-to description is also displayed in separate sections.
There are also formulas for size and detailed diagrams. This is a table saw workbench – the finished product has no shelf or storage.
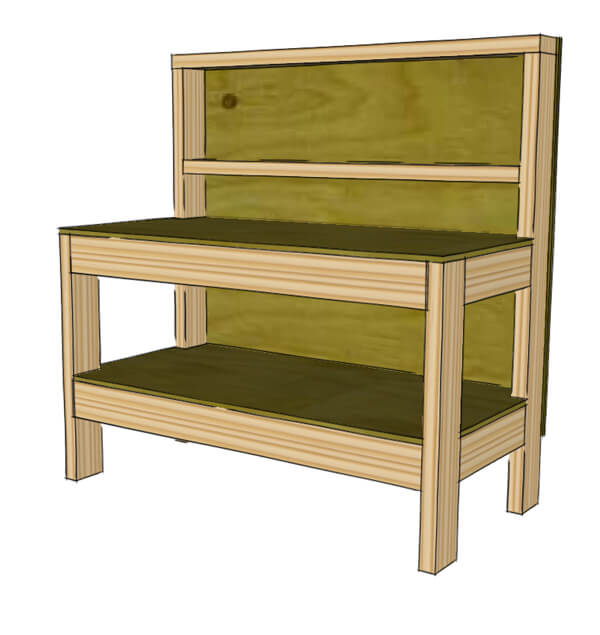
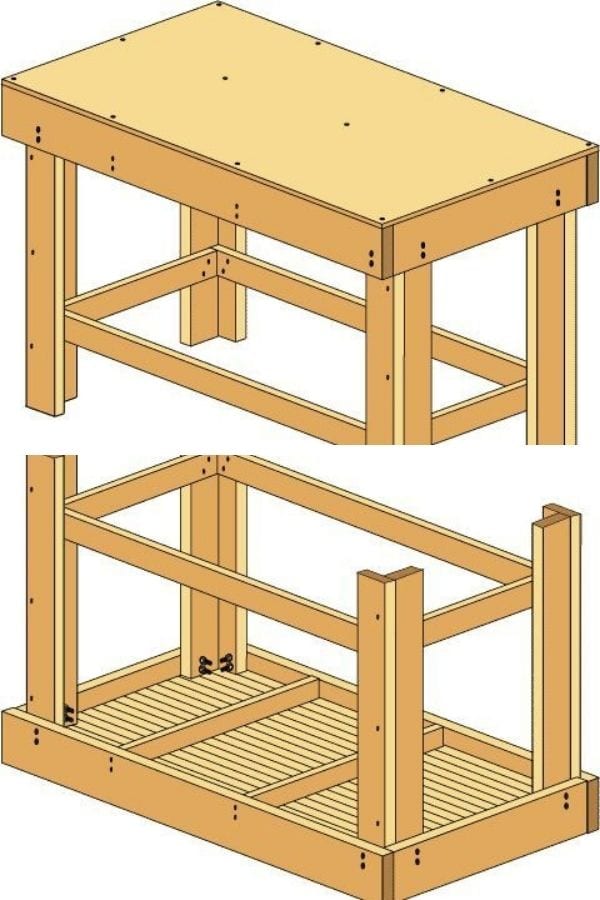
Read more here51. DIY Kids Workbench
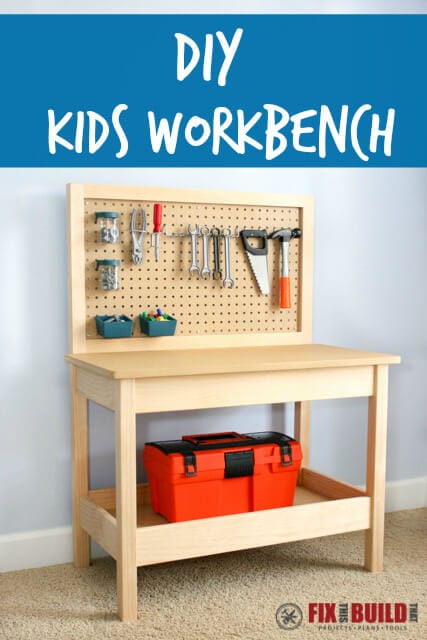
Build for your kids a complete workbench set with a tabletop, bottom shelf, and a pegboard. This free project provides a tool list, supply lists, sketches, color images, and construction directions step by step.
The small silhouette also adds a lovely vibe to the area. You can also change the dimensions to make it a workbench for small adults
Read more here52. Folding Portable Workbench
Unlike the above foldable workbenches that only have folding tops, this plan allows you to fold the whole bench up to 7′ thick. Consequently, portability is its biggest plus.
You can follow the cutting list, technical sketch, and the instruction video. The process only takes up to 4 hours and costs under $100.
Read more here53. Classic Pine Workbench

Classic style always lasts forever and never out of date. This plan is suitable for beginners since it contains only standard steps and runs about $50-100.
Although the design is super simple, the author needs to provide more close-up images of their work from our perspective.
Read more here54. Pallet Workbench
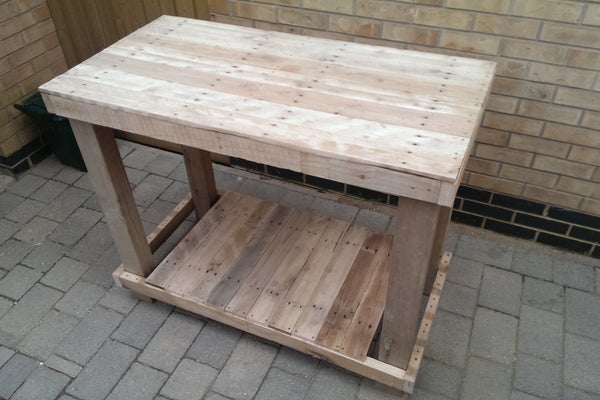
Old bed or wooden crate pallets are still useful if you know how to make use of them. Just build a frame and attach those pallets to it to make a brand new workbench.
What’s more, this workbench is ideal for tall people. If you’re one of them, you don’t have to lean your back down anymore.
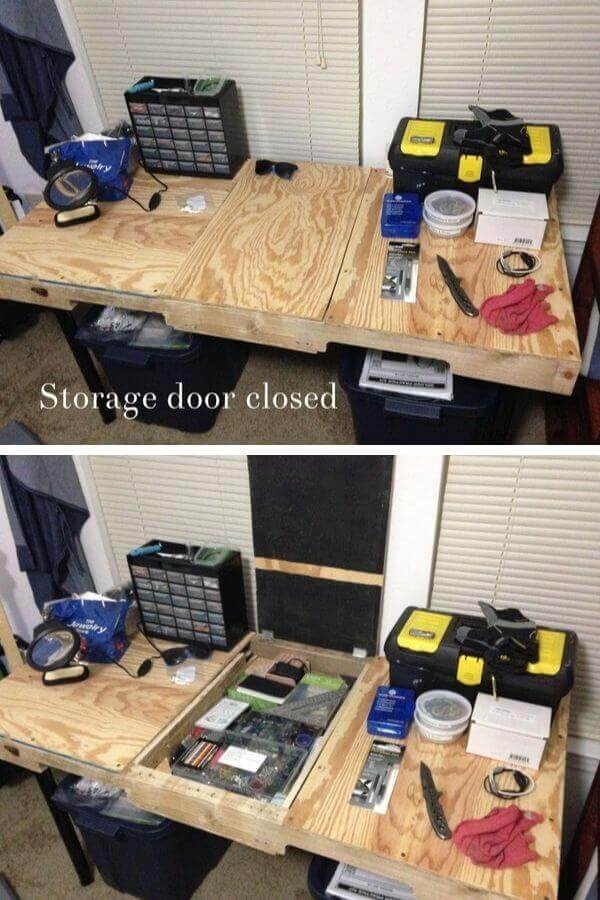
Read more here55. Workbench With Hidden Shelf
If you want to store your’ secret stuff’, this kind of workbench will give you a hidden compartment built into the lower shelf that no one will ever look at.
The main steps are to build a standard workbench frame, construct the middle supports, and then add a bottom surface to make a ‘secret shelf.’
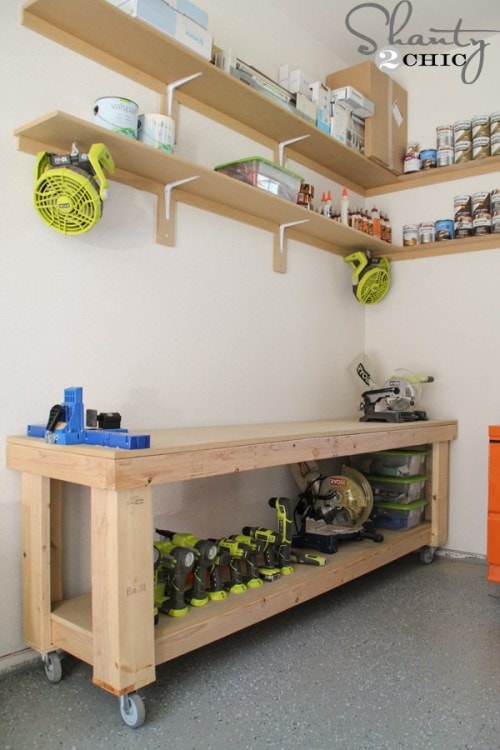
Read more here56. Roll-around Workbench (No Shelf)

This is a novice workbench that suits light and beginner’s using purposes. It has no shelf, so everything will be put on top of the table.
The author focused on the material quality (total price about $120) and the rigidity. You can sit or stand comfortably on the tabletop.
Read more here57. Easy 2×4 Garage Workbench
This plan offers the most traditional workbench design with 1 tabletop and 1 bottom shelf (both have the same dimensions).
The workbench’s top is made from lumber, and the bottom shelf is thick plywood for a sturdy structure.
Furthermore, after each step, the author always gives out top tips to help readers smooth the building process.
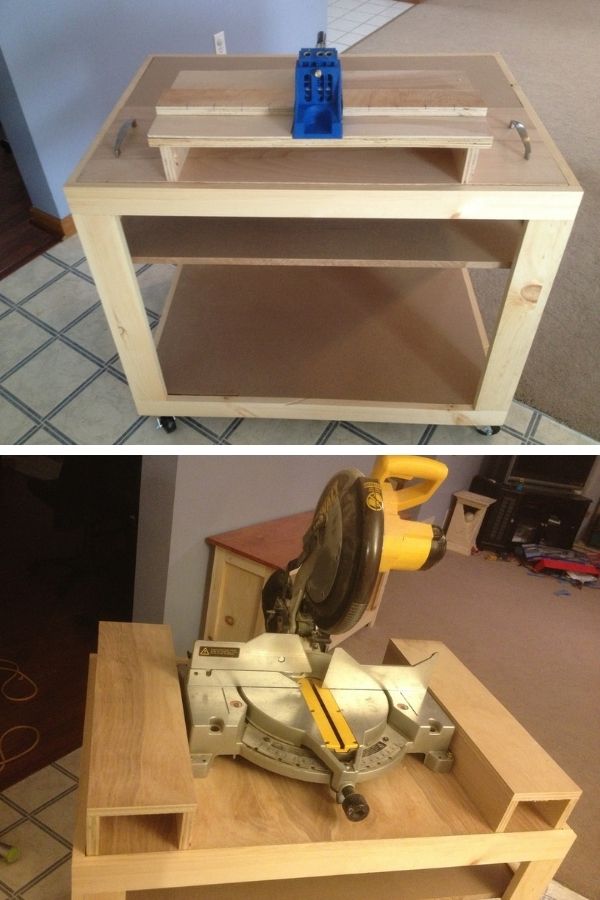
Read more here58. Workbench With Miter Saw Stand
This workbench includes a miter saw stand and can be customized easily. There are rolling carts to tuck the workbench in every corner once the work is done.
The miter saw stand is also the base of this whole project. You will have an elegant symmetrical design since the carts can slide under the bench.
Read more here59. Inexpensive Solid Workbench
This workbench is rock solid and durable thanks to the author’s calculation of the correct proportions when making the frame. He explained thoroughly in the second step, so make sure to read his plan carefully.
The author also recommended some optional steps to help you customize your workbench. Besides, this project runs only around $80.
Read more here60. Super Space-saving Workbench

This workbench is attached straight to the wall and takes up almost no floor space.
Moreover, this all-purpose workbench can become a potting bench or a laundry room table, thanks to its unique design. If you want to use it for carpentry, make an additional pegboard to stick tools on it.
Read more here61. Utility Workbench

This workbench is all you need for woodworking! It features a miter saw stand, a table saw stand, a lower shelf, and quick-moving casters.
The striking look of this workbench comes from the cut-out space. You can remove the piece for the table saw and use it for the mitre saw.
Read more here62. Durable and Cheap 2×4 Workbench
Another idea in the quick-and-cheap collection! This workbench has a simple look and is reliable enough for heavy-duty jobs.
The author provided his instruction in 2 ways: visual videos and step-by-step guidelines. You will have a lot of close-up images to catch up with the idea easily.
Read more here63. Easy Build Workbench
This workbench is a simple construction but renders a super durable and stylish design. The plan is also adjustable to let you customize for a modular system.
You can read the discussion section for more experience from other readers who tried to make this workbench before.
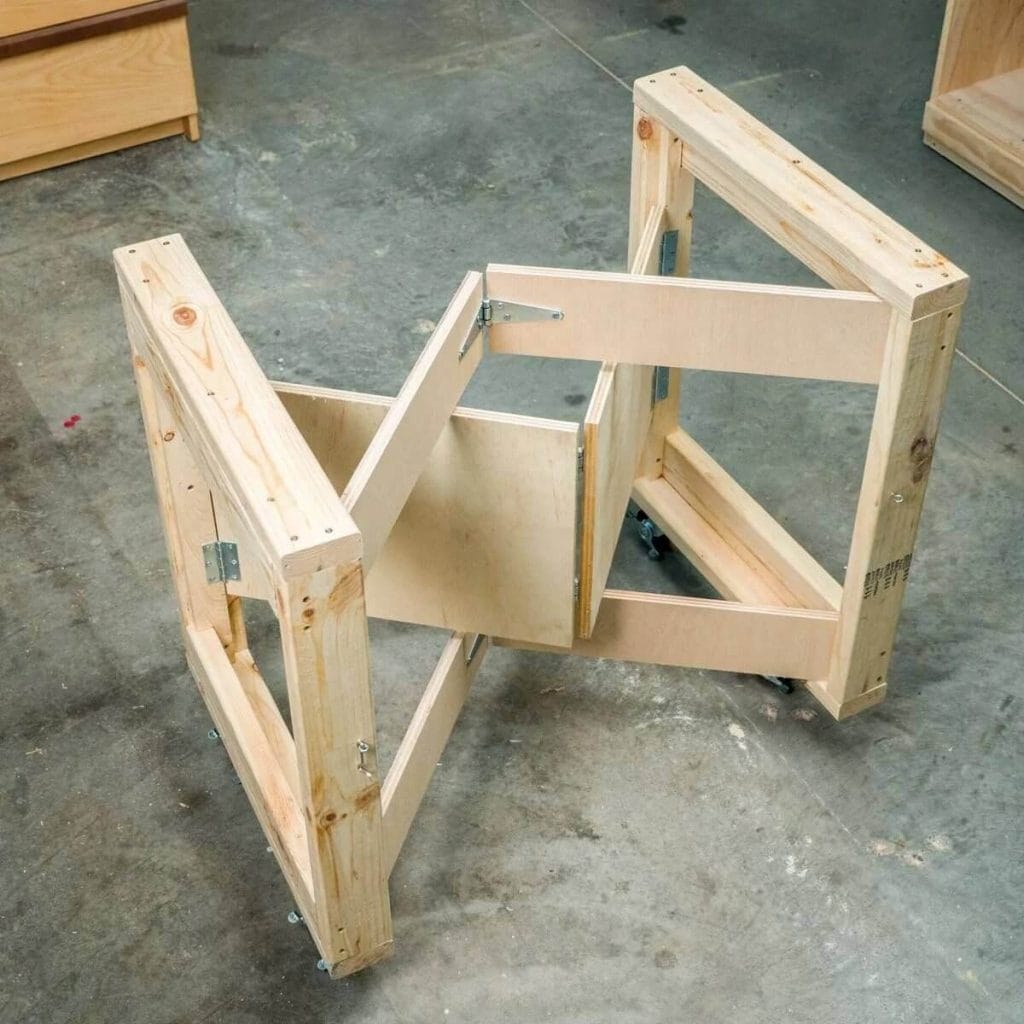
Read more here64. Collapsible Workbench
This workbench costs under $50 and can be broken down into separate parts for easy storage. Therefore, it’s a great option when you want to work outside.
The author suggested using 2×8 instead of 2×4 plywood since it’s less defective and more comfortable to work with the sheet’s corner.
Read more here65. Cubic Blueprint Workbench
This workbench has a stylish design that fits younger users more than middle-aged. You can keep all your small tools beneath the tabletop or right on the table’s surface, thanks to the drilled dog holes.
You can use a whole plywood sheet or cut the lumber to the required dimensions. This workbench is enormous, so you can reduce the size to fit in smaller spaces.
Read more here66. Cheap Workbench
You can build yourself a new workbench for only $25 and adjust the amount of materials for a larger or smaller size (the cost will change accordingly). Scrap materials around your house are also accepted.
Gather an oriented strand board, some necessary hardware, and 2×4 plywood, and then follow the instructions to get the final result!
Read more here67. Portable Workbench
This is a small-sized workbench with rollers for easy transporting. Besides, it’s solid enough to load all of your tools inside.
It also comes with an extension that can slide in and out to create a larger working space or close down to carefully store the equipment.
Read more here68. Pony Wall Workbench

With a sleek and elegant design, this workbench can work as an accessories wardrobe or a kitchen cabinet in addition to carpentry.
You can use any leftover framing board combining with other hardware required in the shopping list. Follow the author’s pictures and videos, and you will finish your job.
Read more here69. Removable Top Workbench
This design looks like a woodshop box with 4 legs. The storage box is removable so that you can tuck it underneath your bed or sofa.
The builder provided many technical sketches for every section with detailed measurements to help readers understand her idea quickly.
Read more here70. Storage Workbench Plan
This design allows you to keep small supplies inside the drawer. There’s a shelf at the center of the tabletop. You will see a ‘lid’ that can open and close to cover the stuff inside.
With this plan, you can make use of the available wood or hinges and legs from old tables. At the end of the day, saving your time is always a good idea.
Read more here71. Beginner Workbench
This handy work area is what you need to kickstart your building journey. The project only requires a circular saw, a router, a drill, and the rest is up to you.
The building instruction is also easy with 4-5 steps. So grasp your tools and start to roll the ball now.
Read more here72. Knock-down Workbench With Dividers
To be honest, the woodworker community never runs out of space-saving ideas. This is another free plan with a detailed description, color diagrams, shopping and cut list.
There is a separate top piece attached with 2 legs, creating a working surface when open up. When folding down, it takes up only 4 square ft.
Read more here73. The Folding Workbench
You can fold this workstation up flat to the wall when not in use. There is a latch placed on the wall to hold the workbench firmly. It looks like an ordinary table when folding down.
The plan consists of a material list, a cut list, and all the measurements. One tip for building this unique bench: set the tabletop onto the wall first and attach the hinges later.
Read more here74. Workbench with Versatile Inserts
This is a usual portable workbench design but comes with the builder’s idea: you can add a versatile shop cart with inserts for tools storage. She also provided diagrams with all dimensions needed.
Remember to check for squares after each stage and drill all holes before attaching the parts together with screws.
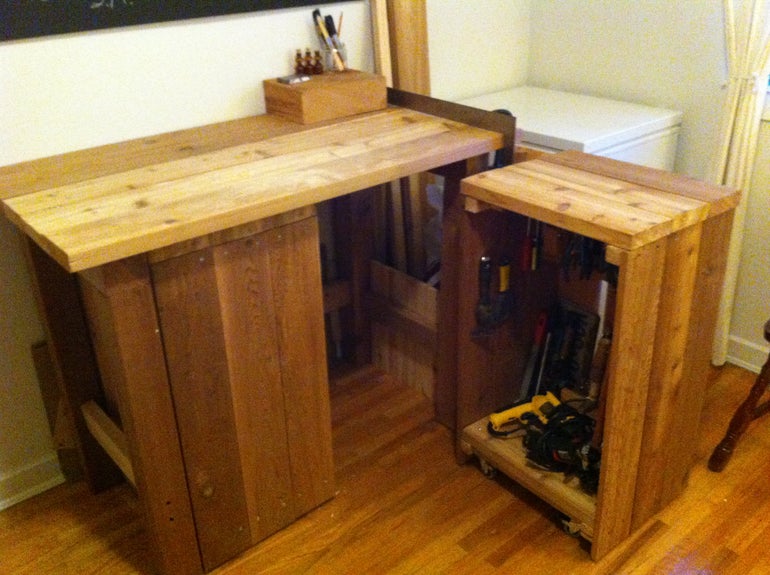
Read more here75. Workbench and Companion Worktable
Follow this plan, and you will get a set of 2: a workbench and a worktable. They both have the same silhouette but in different sizes. You can move the table on its wheels and tuck it under the workbench.
The materials for this set can be easily found in any local store. You will take 5 steps away from these incredible power tools.
Read more hereConclusion
When you’re tired of all the saws, tool chests, grinders, welders littered in your garage, the most crucial tool you will ever need is a workbench.
Building a workbench yourself might be difficult without following some workbench plans verified by many woodworkers.
And we’ve done the work for you, choosing a vast list of best workbench ideas that are creative yet simple to follow.
If you find our list useful, don’t hesitate to share your thoughts in the comment section below.
Let your friends and family know about these incredible ideas to inspire them to try something new too.

![9 Best Pole Saws of 2023 [Ultimate Guide]](https://handykeen.b-cdn.net/wp-content/uploads/2021/03/best-pole-saw-300x200.jpg "9 Best Pole Saws of 2023 [Ultimate Guide]")


